Search for the best resources for learning product photography for ecommerce and you’ll drown in options. Courses, YouTube channels, books, blogs, gear guides, paid communities — all promising to turn your phone snaps into scroll-stopping listings. The problem isn’t a shortage of information. It’s that nobody tells you which format suits your situation, your budget, and the products you actually sell.
This isn’t another ranked list. It’s a filter. By the end, you’ll know how to judge any resource you come across, understand what free and paid options really deliver, and have a 30-day plan to get shooting. If you’re a new seller who needs decent photos without hiring a studio, start here.
What to look for in a learning resource
Before you spend a penny or an hour, ask what a resource actually teaches. Product photography for ecommerce splits into three skill sets: lighting, camera control, and post-processing. A good resource covers all three at a beginner level, or goes deep on one while acknowledging the others exist. If a course spends four hours on camera menus and ten minutes on lighting, it’s backwards. Light shapes the photo; the camera just records it.
Look for teaching that’s specific to products. Portrait photography courses teach you to flatter faces, not reflective bottles or matte fabric. The lighting problems are different. A resource built for ecommerce will address white backgrounds, consistent colour across a catalogue, and the reality that most product shots are viewed as small thumbnails on a phone screen.
Check whether the instructor shows their working setup. Can you see the lights, the modifiers, the table? Vague advice like “use soft light” is useless if you don’t know what creates it. The best teachers show cheap and expensive versions of the same setup, so you can start where you are.
Finally, look at how current the material is. Camera apps, editing software interfaces, and marketplace image requirements change. A course from several years ago might still teach solid lighting theory, but its software walkthroughs could confuse you. Prefer resources that get updated or that focus on principles over button locations.
Free vs paid: what you actually get
Free resources are brilliant for orientation. You can learn the exposure triangle, understand why a diffuser softens shadows, and see dozens of product setups without spending anything. YouTube alone could keep you busy for months. The catch is structure. Free content is scattered, often contradictory, and rarely builds in the right order. You might learn three lighting styles before you understand why your white balance keeps drifting.
Paid resources sell you a path. A decent course sequences the learning, gives you assignments, and often includes feedback or a community. That structure is worth paying for if you struggle to self-direct. What you’re not paying for is secret knowledge. The techniques in a good paid course exist for free somewhere. You’re buying curation, order, and accountability.
Be sceptical of anything promising professional results with no practice. Photography is a physical skill. No resource can install it in you. Also watch for courses that are really gear advertisements in disguise. If every lesson ends with a recommendation to buy a specific light, the teaching may be shaped around sponsorship rather than your needs.
A sensible split for a beginner: start free to confirm you enjoy the work and understand the basics, then pay for one structured course once you know what you’re missing. Don’t buy three courses at once. You’ll finish none of them.
Top picks by format
Rather than naming individual creators, which dates quickly, here’s how each format performs and what to expect from the good ones.
Video courses and structured online classes suit people who want a syllabus. The best ones run four to eight hours, include downloadable lighting diagrams, and set practical assignments. Look for courses that teach with a single light first, then add complexity. If a course starts with a five-light setup, it’s showing off, not teaching.
YouTube channels work best as a supplement. Use them to solve specific problems: how to photograph jewellery without glare, how to shoot black products on white, how to remove dust in editing. The strongest channels show real shoots with mistakes left in. Avoid channels that only review gear; they entertain but don’t teach.
Books still hold up for lighting theory. A good photography lighting book explains the physics of soft versus hard light better than most videos, because diagrams don’t need pausing. Books are also cheap second-hand. The weakness is they can’t show you current editing software, so pair a book with video for the post-processing side.
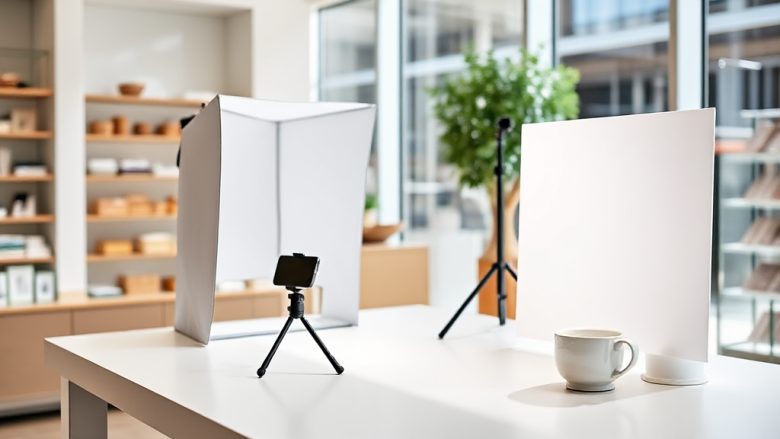
Practice setups deserve a mention as a resource in themselves. A table near a window, a sheet of white foam board, and a phone with a manual camera app will teach you more in a weekend than a week of passive watching. Some of the best learning happens when you try to recreate a photo you admire and fail, then figure out why.
Communities and feedback groups round things out. Honest critique accelerates learning faster than any tutorial. Find a group where people share product shots and ask for specific feedback, not just likes. One useful rule: post your photo with the setup details, so advice is grounded in reality.
A 30-day practice plan
Theory without shooting is just entertainment. Here’s a month that builds real skill without overwhelming you.
Days 1 to 7: learn your camera. Whether it’s a phone or a mirrorless body, spend a week shooting one object — a mug, a candle, a pair of shoes — in different light. Window light in the morning, window light in the afternoon, a desk lamp, overhead room light. Note what changes. Learn where your white balance control lives and use it manually.
Days 8 to 14: build a one-light setup. Use a window with a white sheet as a diffuser, or a single inexpensive LED panel. Add a white foam board opposite the light to bounce fill into the shadows. Shoot the same product every day with small changes: move the light closer, further, higher, lower. This week teaches you more about lighting than any course, because you see cause and effect.
Days 15 to 21: learn editing. Pick one editor and stick with it. Learn to correct white balance, adjust exposure, clean up dust spots, and export at the right size for your marketplace. Don’t chase trendy colour grades. For ecommerce, accurate colour and a clean background matter more than mood.
Days 22 to 30: shoot a full product set. Choose five products from your store and photograph them consistently — same background, same lighting, same framing. Consistency is what makes a catalogue look professional. Then compare your first day’s photos with your last. The gap will surprise you.
Common mistakes when learning
The most common mistake is buying gear before learning light. A new lens won’t fix bad lighting. Spend your first month with whatever you own, then buy only what solves a problem you can name.
Another is copying complex setups. Beginners see a three-light studio shot and try to replicate it immediately, then get confused when it looks wrong. Start with one light. Add a second only when you understand what the first is doing.
Editing too much is a close third. Over-sharpened, over-saturated product photos look untrustworthy and can get rejected by marketplaces. Aim for clean and accurate, not dramatic.
Ignoring the thumbnail is a quiet killer. Your photo will mostly be seen small. If the product doesn’t read clearly at thumbnail size, the composition needs work, no matter how good it looks full-screen.
Finally, learning in isolation. Without feedback, you repeat your own mistakes for months. Share your work, ask specific questions, and accept critique as data rather than insult.
The best resources for learning product photography for ecommerce aren’t the most expensive or the most popular. They’re the ones that match how you learn and push you to shoot. Start free, practise deliberately, pay for structure only when you feel the gap, and let your own catalogue be the final judge. Your tenth photo will teach you more than your first ten tutorials.